HOW TO USE MASKING TAPE FOR PAINTING
You’ve made the desicion to decorate and give your home a fresh look with some paint – GREAT! You’ve been to the shops and spent hours deciding which colour is going to look best.
So now what?… Preparation is KEY when it comes to decorating and one of the most important tools needed to give your home the perfect finish is masking tape. You can browse through our masking tapes below to find which is best for you. But first, we are going to explain how to correctly apply the masking tape before you start painting to ensure you get the best results possible.
Masking tape application techniques:
1. Make sure your surface is clean. Ensure dirt and dust is removed from surfaces and that your surface is dry before applying masking tape to guarantee perfect adhesion.
2. Use short strips of tape. Using shorter strips instead of trying to masking tape a whole length of skirting board with 1 piece will help give more precision. Be sure to overlap each piece so removal of the tape will be easy.
3. Seal the masking tape. After the tape is applied and you are happy with it, go along with your finger to seal it onto the skirting board/window ledges etc, this will make sure the tape doesn’t lift while painting.
4. Use a bit of paint to seal further. When you start painting we advise to cut in the edges first, so go along with a small paint brush and brush against the tape. Doing so will seal your tape even further and prevent lifting / paint bleeding and ensure clean cut finishes.
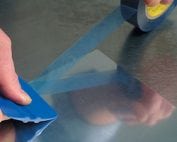
When your paint is dry, pull of the masking tape at a 45° angle.


Leave A Comment
You must be logged in to post a comment.